
So I am here with a new guide about the correct use of the Airtable component present in kodular. If I had to describe the usage of Airtable so I would tell it is similar to Microsoft Excel but it’s a type of online spreadsheet in which we can store our app’s user data. We will be going into more detail later in this post.
Table of Contents
What is Airtable?
Airtable is an online platform in which we can create and share databases we have created. But there’s something different about Airtable, it stands out as a no-code database creating a website in which we can create the databases of our app just like how we make an Excel sheet and later we can use their API key to get the data we have made using Airtable very easily into our very own Kodular Application without writing a single line of code in this entire guide.
Get Started With Airtable
Firstly we have to create an account on Airtable. For this, we will head to airtable.com and simply click on the Signup For Free button in the top right corner of the webpage. Once you have made an account on Airtable. You will see a dashboard where you have to click on Create a Base and then select your desired workspace name and then click Create and cheers! It will make your Airtable database.
Setting Up App On Kodular
After this, you have to make a new project in kodular or you can apply this to your existing project too. So, firstly you have to drag and drop the Spreadsheet component to your designer section and then set up the app UI according to your preference.
This is a simple application that will store Name and Email which the user enters into our Airtable spreadsheet. It will also be able to get the Email of the user by its name.
Setting up Airtable in Kodular
Now as we have successfully made the app UI and set up our Airtable account, now we have to connect our app to Airtable. For that make sure you have dragged the spreadsheet component as I told you earlier. Now we have to get the following details from our Airtable database:
1. API Key
For getting the API key of our database we have to head to this webpage and copy our API key from there.
2. Base ID
Open your Airtable database and see the URL, it will be of the following format in which BASE_ID will be your base id as shown.
https://airtable.com/BASE_ID/tbl8LSftAC8OstrHw/viwvSP0ueLlSE6Al3?blocks=hide3. Table Name
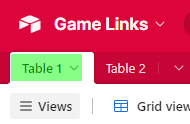
4. View Name
Grid View is the default view name so you don’t have to change it.
After all these steps are done, you have to put these all in Spreadsheet component properties.
Follow usage videos below to learn more.
Video (Usage Example):
Thank you for sticking to the end! See you in another Guide.